
How to Personalize Wedding Favors with a Laser Engraver: A DIY Guide
How to Personalize Wedding Favors with a Laser Engraver: A DIY Guide
Imagine your wedding guests receiving a small, exquisitely personalized gift – a memento of your special day that truly reflects your style and appreciation. Instead of generic trinkets, picture delicate wooden coasters engraved with each guest’s name, or elegant glass ornaments etched with your wedding date. This level of personalization is achievable, surprisingly accessible, and incredibly rewarding with the help of a laser engraver.
This guide will walk you through the process of creating unforgettable, personalized wedding favors using a laser engraver. We’ll cover design considerations, material selection, the engraving process, and finishing touches to ensure your DIY favors are a resounding success. By 2026, expect to see even more couples opting for this approach, making their weddings truly stand out.
Understanding Laser Engraving for Wedding Favors
Laser engraving is a subtractive manufacturing process that uses a focused beam of light (a laser) to vaporize material. This creates precise and permanent marks on a variety of surfaces. For wedding favors, this technology opens up a world of creative possibilities.
Benefits of Using a Laser Engraver for Wedding Favors:
- Precision and Detail: Laser engravers can create intricate designs and text with remarkable accuracy, far exceeding the capabilities of traditional engraving methods.
- Versatility: They work on a wide range of materials, including wood, glass, acrylic, metal, leather, and even some fabrics.
- Personalization: Easily add individual names, dates, monograms, or custom artwork to each favor.
- Efficiency: Once the design is finalized, a laser engraver can quickly produce multiple identical favors, saving you time and effort.
- Professional Finish: Laser engraving provides a clean, professional look that elevates the perceived value of your favors.
Choosing the Right Materials for Your Laser Engraved Favors
The material you select will significantly impact the overall look and feel of your wedding favors. Here are some popular options and their characteristics:
- Wood: A classic and versatile choice. Options include birch plywood (for a light, rustic look), walnut (for a richer, darker tone), and bamboo (an eco-friendly option). Consider the grain pattern and hardness of the wood when selecting your design.
- Glass: Elegant and sophisticated. Wine glasses, shot glasses, coasters, and ornaments are all excellent choices. Be mindful of the glass thickness and avoid designs with sharp angles, which can weaken the material.
- Acrylic: A modern and durable material. Available in a wide range of colors and finishes, acrylic is ideal for keychains, tags, and decorative items.
- Leather: Adds a touch of luxury. Leather keychains, luggage tags, and small pouches can be beautifully engraved with monograms or simple designs.
- Metal: For a sleek and contemporary feel. Stainless steel flasks, bottle openers, or small pendants can be laser engraved with names, dates, or meaningful symbols.
Always test your chosen material with your laser engraver before committing to a large batch. Different materials require different power settings and engraving speeds.
Designing Your Laser Engraved Wedding Favors
The design phase is crucial for creating memorable wedding favors. Keep these tips in mind:
- Simplicity is Key: Intricate designs can be challenging to engrave and may not translate well on small items. Opt for clean lines, bold fonts, and simple graphics.
- Consider Your Wedding Theme: The design should complement your overall wedding style. For a rustic wedding, consider incorporating natural elements like leaves or branches. For a modern wedding, geometric patterns or minimalist monograms may be more appropriate.
- Personalize, Personalize, Personalize: Adding each guest’s name or initials elevates the favor from a generic trinket to a cherished keepsake.
- Use High-Resolution Graphics: Ensure your artwork is high-resolution to avoid pixelation during the engraving process. Vector graphics are ideal for laser engraving as they can be scaled without loss of quality.
- Test Your Design: Before engraving a large batch of favors, test your design on a scrap piece of the same material to ensure it looks as expected.
The Laser Engraving Process: A Step-by-Step Guide
Once you have your design and materials ready, follow these steps to engrave your wedding favors:
- Prepare Your Materials: Clean the surface of your chosen material to remove any dust, dirt, or fingerprints. This will ensure a clean and consistent engraving.
- Position Your Material: Securely position your material in the laser engraver. Use clamps or jigs to prevent it from moving during the engraving process.
- Import Your Design: Import your design into the laser engraver’s software.
- Adjust the Settings: Adjust the power, speed, and frequency settings based on the type of material you are using. Refer to your laser engraver’s manual for recommended settings. A starting point for wood might be 20% power and 40% speed, but experimentation is key. For glass, start with low power (around 10%) and high speed (around 80%).
- Focus the Laser: Ensure the laser is properly focused on the surface of the material. This is crucial for achieving a sharp and detailed engraving.
- Run a Test Engraving: Before engraving the entire batch, run a test engraving on a scrap piece of the same material to verify your settings.
- Start Engraving: Once you are satisfied with the test engraving, start engraving your wedding favors. Monitor the process closely and make any necessary adjustments to the settings.
- Clean Up: After engraving, clean the surface of your favors to remove any residue or debris.
Finishing Touches: Elevating Your Laser Engraved Wedding Favors
After engraving, consider adding finishing touches to enhance the overall look of your favors:
- Sanding: For wooden favors, lightly sand the edges to remove any splinters or rough spots.
- Sealing: Apply a clear sealant to wooden or leather favors to protect the engraved design and enhance their durability.
- Painting or Staining: Add color to your wooden favors by painting or staining them.
- Ribbon or Twine: Tie a ribbon or twine around your favors to add a touch of elegance and presentation. Choose colors that complement your wedding theme.
- Packaging: Present your favors in individual boxes or bags to protect them and add a professional touch.
Achieving Perfect Wedding Favors with the xTool S1 Laser Engraver
While the process of laser engraving might seem daunting initially, the xTool S1 20W Laser Cutter and Laser Engraver makes it incredibly accessible and user-friendly, even for beginners. This machine isn’t just powerful; it’s designed with precision and ease of use in mind, making it the ideal tool for creating personalized wedding favors that will truly impress your guests. See current deal.
The xTool S1 boasts a generous 23.93″ x 15.16″ bed size, allowing you to engrave multiple favors simultaneously, saving you valuable time. Its impressive 600mm/s speed ensures that even large quantities of favors can be produced efficiently. The enclosed design prioritizes safety, minimizing the risk of stray laser light exposure. The integrated rotary attachment is particularly useful for engraving cylindrical objects like glasses and tumblers, expanding your creative possibilities. With a 4.5/5 rating from 122 reviews, its reliability is well-documented. Check price on Amazon.
Imagine effortlessly engraving delicate floral patterns onto wooden coasters, personalizing glass ornaments with elegant monograms, or creating intricate designs on leather keychains – all with the precision and ease of the xTool S1. It is compatible with a wide variety of materials, from wood and acrylic to metal and glass. The machine can handle materials up to a certain thickness, typically around 3-5mm depending on the material, although thinner materials generally provide better results for detailed engraving. The 20W laser provides ample power for most wedding favor materials, and the software is intuitive and easy to learn.
For smaller, more portable projects, or for those interested in color marking on metal, consider the xTool F2 5W IR & 15W Diode Dual Laser Engraver. This machine, with its built-in 50MP camera and 6000mm/s ultra-fast speed, offers incredible versatility in a compact design.
Beyond Favors: Expanding Your DIY Wedding Creations
The possibilities don’t end with wedding favors. A laser engraver can be used to create a wide range of other DIY wedding items:
- Wedding Invitations: Engrave your invitations on wood, acrylic, or even leather for a unique and memorable touch.
- Table Numbers: Create custom table numbers that complement your wedding theme.
- Seating Charts: Design a stunning seating chart on a large piece of wood or acrylic.
- Cake Toppers: Personalize your cake topper with your names, wedding date, or a special message.
- Welcome Signs: Create a beautiful welcome sign to greet your guests as they arrive at your wedding venue.
Troubleshooting Common Laser Engraving Issues
Even with the best equipment, you may encounter some challenges during the laser engraving process. Here are some common issues and their solutions:
- Inconsistent Engraving Depth: Ensure the laser is properly focused and the material is evenly supported. Adjust the power and speed settings as needed.
- Burning or Scorching: Reduce the power and increase the speed. You may also need to experiment with different materials.
- Blurred or Pixelated Engraving: Use high-resolution graphics and ensure the laser is properly focused.
- Material Movement: Securely clamp or jig your material to prevent it from moving during the engraving process.
- Smoke Buildup: Ensure proper ventilation to remove smoke and debris.
Creative Inspiration for Laser Engraved Wedding Favors
Stuck for ideas? Here’s some creative inspiration to get you started:
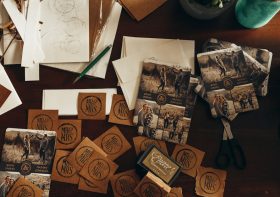
- Engraved Wooden Coasters: Personalize each coaster with the guest’s name or initials, and your wedding date.
- Glass Ornaments: Etch your names, wedding date, and a meaningful symbol onto glass ornaments.
- Acrylic Keychains: Create custom keychains with your wedding logo or a fun design.
- Leather Luggage Tags: Engrave leather luggage tags with your guests’ names and addresses.
- Metal Bottle Openers: Personalize metal bottle openers with your wedding date and a special message.
- Seed Packets: Engrave a small wooden tag to attach to seed packets, symbolizing growth and new beginnings.
- Miniature Succulents: Add a laser-engraved tag with the guest’s name to a small succulent pot, offering a lasting reminder of your special day.
Creating personalized wedding favors with a laser engraver allows you to add a unique and memorable touch to your special day. With careful planning, the right equipment, and a little creativity, you can craft favors that your guests will cherish for years to come. The precision, versatility, and personalization options make laser engraving an excellent choice for DIY wedding projects. Remember to prioritize safety, test your designs, and enjoy the creative process. It is a way to add a personal touch, reflecting your and your partner’s personality. Good preparation, thoughtful designs, and attention to detail are essential for producing high-quality, memorable wedding favors.
Leave a Reply